Home Assistant is an open source home automation platform that can monitor and control smart home devices and it integrates with many of other common systems.

Home Assistant installation is targeted for Raspberry Pi’s but other hardware options are available.
I was very impressed how easy it was to install Home Assistant and get a basic home integration system up and running.
There is a huge number of integration solutions (1500+) that connect to most of the mainstream products. However if you want to do some custom Arduino or Raspberry Pi connections there isn’t an easy “out of the box” solution. To solve this requirement Home Assistant has included Node-Red as an add-on.
Node-RED is a visual programming tool for wiring together hardware devices, APIs and online services.
I found that getting the Node-Red integration was a little tricky. This blog will show how to get Node-Red integration working and it includes a simple simulator circuit.
Getting Started
The installation instructions are very straightforward. I would recommend using a wired connection for your Raspberry Pi. A wireless network connection is 100% possible but it is not in the base installation directions.
After the basic installation is complete, add-ons can be installed under the Supervisor->Dashboard. I would recommend installing “File editor” and “Terminal & SSH” add-ons along with Node-Red.

I found that the Node-Red installed without any problems but it required some configuration changes before it would run.
In the Node Red add-on you will need to add a credential_secret and a password.

If Node-Red doesn’t start look at the log for errors (it’s at the bottom of the same page).

The base Node-Red installation has a very good selection of pre-installed nodes. If you wish to add more nodes see the “Manage Pallet” option that is accessed from the top right options icon.
At this stage Node-Red is somewhat standalone and it is not fully integrated with Home Assistant.
Integrating Node-Red with Home Assistant
The directions and files for Node-Red integration can be downloaded to your PC.

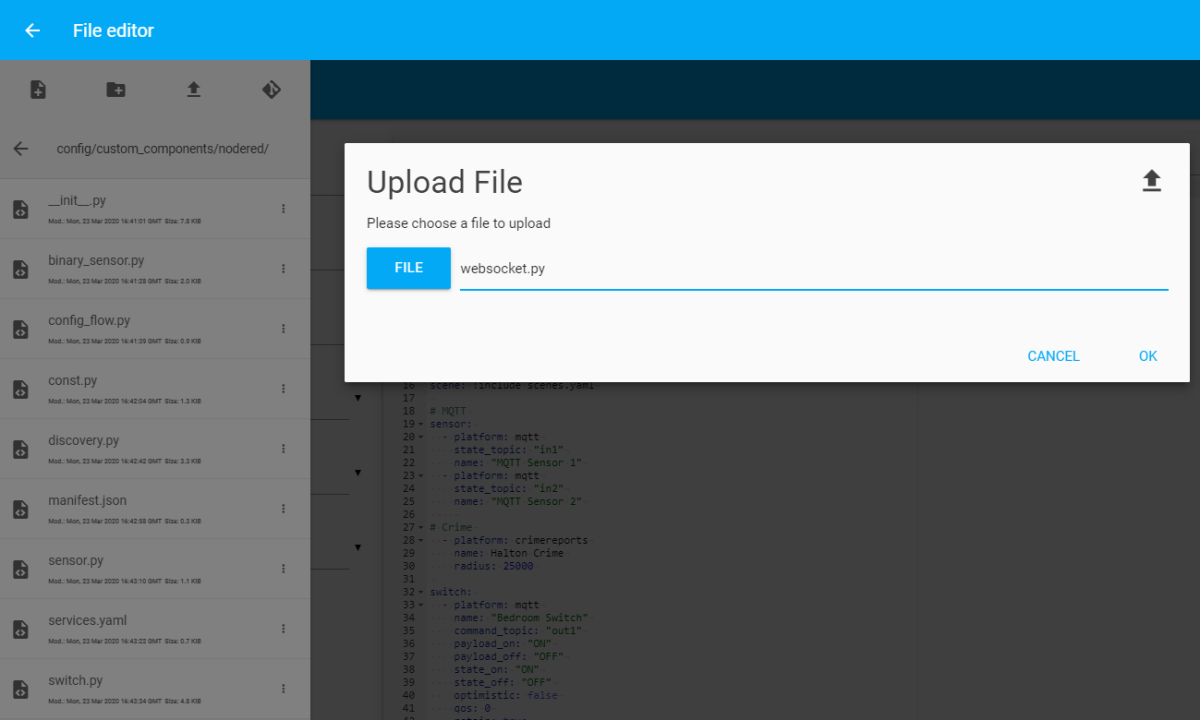
Specifically you want to custom_components/nodered directory and files, which will need to be moved to the Raspberry Pi. The Home Assistant “File editor” add-on can be used to create Pi directories and move files from your PC.

The following directories and file should now exist:
/root/config/custom_components/nodered/__init__.py
/root/config/custom_components/nodered/__pycache__
/root/config/custom_components/nodered/binary_sensor.py
/root/config/custom_components/nodered/config_flow.py
/root/config/custom_components/nodered/const.py
/root/config/custom_components/nodered/discovery.py
/root/config/custom_components/nodered/manifest.json
/root/config/custom_components/nodered/save.txt
/root/config/custom_components/nodered/sensor.py
/root/config/custom_components/nodered/services.yaml
/root/config/custom_components/nodered/switch.py
/root/config/custom_components/nodered/websocket.py

/root/config/custom_components/nodered/.translations/en.json
Once this is complete Home Assistant will need to be restarted.
Including Node-Red Integrations
The next step is to create sensors and switches in Node-Red that can be accessed in Home Assistant. Below is a simple circuit that sends a random number (0-100) to a HA entity.
This logic uses a Big Timer node, that generates a pulse every minute from the middle output pin. An injector node allow you to force a new value. A random node will output a new random number whenever the Big Timer or Inject nodes are triggered.

Double-click on the HA entity to configure the HA server and other properties.

Once the logic is complete click the “Deploy” button to make the logic active.
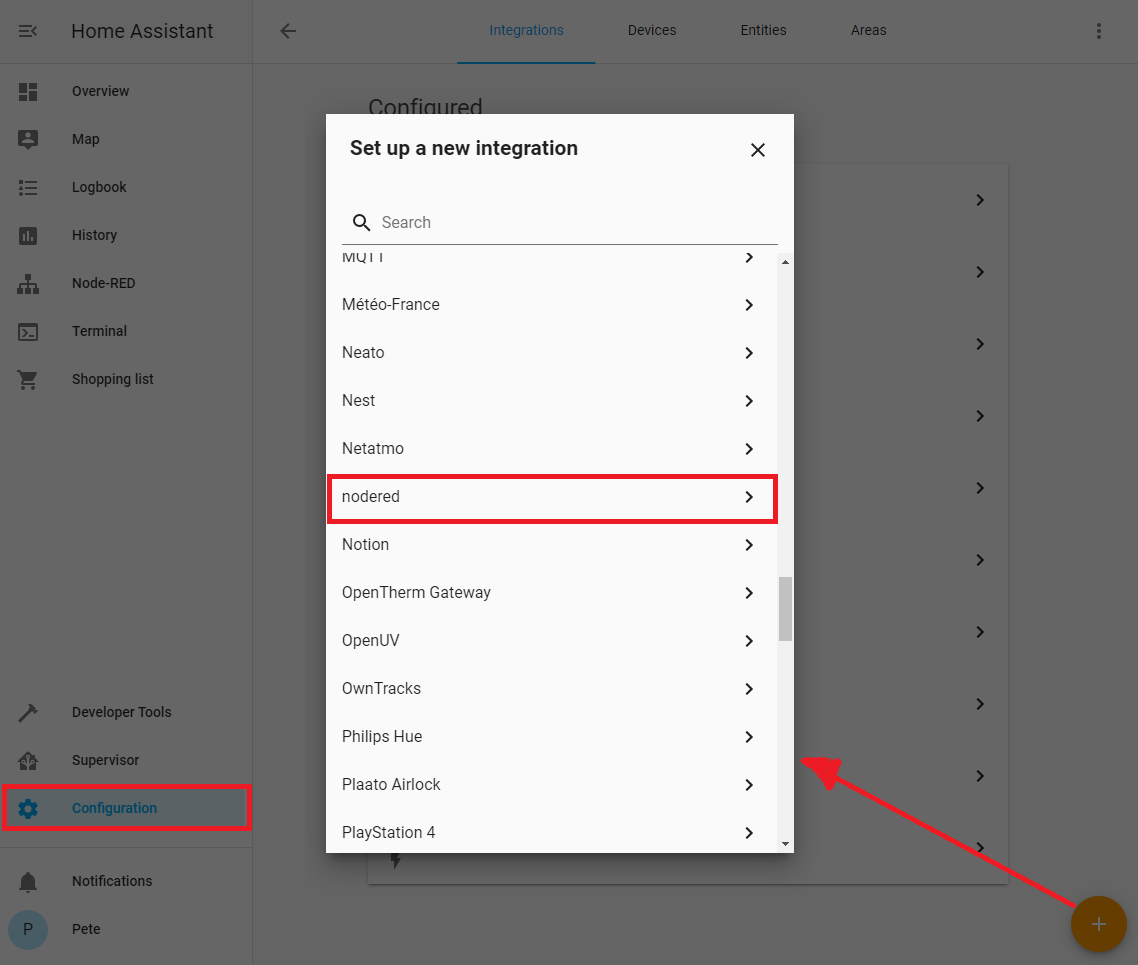
Node-Red integration is enabled by adding it in the Configuration->Integration page.


Overview Dashboard with Node-Red Data
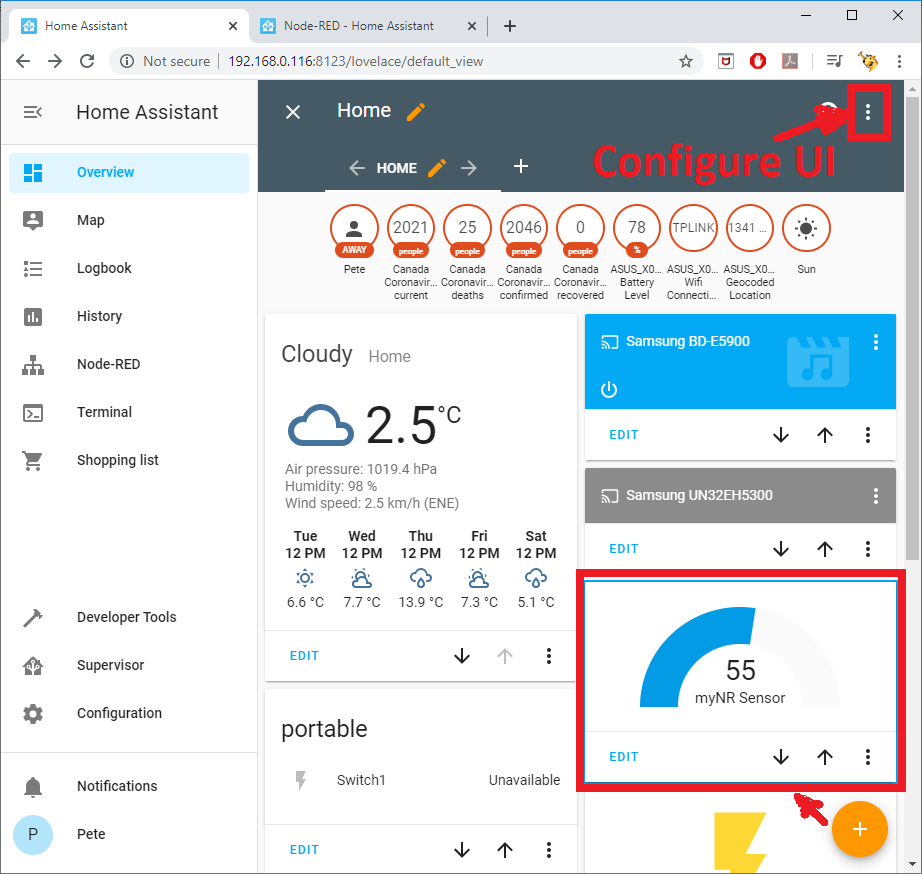
The final step is to modify the Overview Dashboard to include the Node-Red Entity.
For this example I added a gauge component using the Orange-Plus at the bottom right of this Configure UI page.

On the live Overview page it is possible to click on the gauge card and get more information about this sensor.

Final Thoughts
Home Assistant is a very well structured home automation solution that offers a number of excellent approaches to bring in data.
Node-Red is a very flexible programming environment that help expands connectivity to Arduino, Raspberry Pi and other 3rd party services that are not in the base Home Assistant software.
For information on how to connect an Arduino module to Node-Red see:

Stupid question… and maybe I just need to read your blog entry more thoroughly (??) but what does installing the extra integrations give you over what is installed on a stock home assistant instance?
LikeLike
OK I think I got it now…. thanks for this blog entry!
LikeLike
Thank you for the tutorial. I used the node “entity” and was happy. Unfortunately I am struggling to include an “entity” on an external raspi. I tried so many ways but I am not able to connect to the home assistant. “Error: Invalid access token or password for websocket”. An example would really help, 🙂 .
LikeLike
Hi, I’m glad the tutorial was helpful.
I used the HA Rest API to push items (entities) from other devices and Rasp Pi’s to my HA node.
I wrote some of my notes (https://funprojects.blog/2020/12/12/home-assistant-rest-api/) that included how to pass an access token and a password.
I’m not sure if this is what you want. Another approach is to set up an MQTT broker. This is supported in both HA and Node Red. Then in your other nodes you could pass the data via MQTT.
I hope that this helps. If you’re still having questions let me know.
Cheers Pete
LikeLike
Thanks for your quick reply ! This is exactly what I looked for. I also found the (quick) solution for my problem before reading your reply (which also includes the solution) :
https://zachowj.github.io/node-red-contrib-home-assistant-websocket/guide/#prerequisites
I am at the beginning of my experiments. So your other page (2020/12/12 …) will certainly give me additional ideas, of what is possible.
LikeLike
Really glad to hear that it’s working.
I might be working on a similar project to you. I want my HA to pull data from other nodes (rather than have other nodes push it).
HA has some pull mechanisms, for pulling REST into HA (https://www.home-assistant.io/integrations/rest/)
LikeLike