
I wanted to introduce my daughters to using PHP on Raspberry Pi Projects. My goal has been to try and keep things super minimalist so that they can quickly pull together a project for school without being overwhelmed with installation or dependency issues.
In this blog I will look at:
- Running a 1-Line PHP server (no other web server will be used or installed)
- Show Bash diagnostics tools on a PHP page (3 lines of PHP)
- Use a PHP calls to read/write Rasp Pi GPIO pins
Loading and Running a PHP Server
Typically PHP is loaded with Web server applications like Apache, but PHP can be run as a standalone application. To install PHP on a Raspberry Pi or Ubuntu system:
sudo apt-get install php -y
The syntax to run PHP as a standalone web server:
php -S <addr>:<port> [-t docroot] startpage

# for example
php -S 192.168.0.111:8080 mypage.htm

# to use Bash to get your IP
php -S $(hostname -I | awk '{print $1 ":8080"}') mypage.htm
It’s important to note that the standalone PHP server is designed for testing and very small projects. It should not be used for any kind of production environment.
Superquick PHP Primer
PHP is an extremely popular Web programming language.
PHP originally stood for : Personal Home Page, but after a lot of enhancements it now stands for: “PHP: Hypertext Preprocessor”.
A PHP file normally contains HTML tags, and some PHP scripting code. A PHP script starts with “<?php” and ends with “?>“. An example would be (test1.php) :
<!DOCTYPE html>
<html>
<body>

<h1>A PHP Test Page</h1>

<?php
// This is PHP script block
$a = 4;
$b = 6;
echo "Hello World! ";
echo "4 x 6 =" . ($a * $b);
?>
<p>Below is a single line of PHP</p>
<?php echo "This is a single line" ?>

</body>
</html>
To learn about the PHP syntax there are some good references.
To run this page:
php -S $(hostname -I | awk '{print $1 ") test1.php

It’s useful to know that PHP code can be run directly with the PHP interpreter:
# A single line of PHP (note: -r for single line)
$ php -r '$a=4; $b=5; echo  $a * $b . "\n" ; '
20

# Run a PHP script
$ php test1.php

<!DOCTYPE html>
<html>
<body>

<h1>A PHP Test Page</h1>

Hello World! 4 x 6 =24<p>Below is a single line of PHP</p>
This is a single line
</body>
</html>
Command line Diagnostics on a Web Page
Linux command line utilities can have their output viewable on a Web page. The example below (vmstats.php) uses the PHP shell_exec call to execute the vmstat command line utility and the results are echoed to the web page. The <pre> tag is used to present the results in fixed-width font.
<?php
// vmstats.php - A PHP test page to some CPU stats
echo "<pre>";
echo shell_exec('vmstat');
echo "</pre>";
?>
A 1 line PHP web server command to call this page is:
php -S $(hostname -I | awk '{print $1 ":8080") vmstats.php

PHP Interfacing to Pi GPIO
There are a few ways to access the GPIO pins in PHP:
1. use a PHP library
2. shell to the gpio command
Using a PHP library allows for a standard PHP interface, with an object model.
However from testing I found that the PHP libraries were not as flexible as the standard gpio command. For example you could not access extended GPIO pin numbers (i.e. 200).
GPIO Command Line Utility
PHP can shell out to the gpio command line utility. I liked this approach because I could test the actions manually before putting them into a PHP web page.
A simple gpio read example would be:
<html lang="en">
<head>
</head>
<body>
<?php
$ret = shell_exec('gpio read 7');
echo "Pin 7 status = " . $ret;
?>
</body>
</html>
And a gpio write example (with reading back the result) would be:
<html>
<head>
</head>
<body>
<?php
exec("gpio write 7 1");
$ret = shell_exec('gpio read 7');
echo "Pin 7 status = " . $ret;
?>
</body>
</html>
Control A Pi Rover using PHP
The Raspberry Pi rover project is a good example that pulls together:
- Control of Pi GPIO pins
- PHP Forms
- Cascading Style Sheets (CSS) for mobile phone presentations
Motors should not be connected directly to a Raspberry Pi because they could potential damage the Pi hardware. It is recommended that some intermediate equipment or a motor top be used. For this project we used a Pimoroni ExplorerHat Pro.
PHP Forms
This example uses an HTML post method that is defined in the <form> tag. The buttons pass the values of: go, stop, left and right.
The PHP code look for the post value and then does a gpio write for the required action. For example a go will turn on both GPIO motor pins.
The full PHP code is below:
<?php
// rover.php - control Rasp Pi GPIO pins using PHP form with buttons
//

// adjust pins for the specific motor setup
$leftpin = 7;
$rightpin = 2;

// Get post feedback message
if (isset($_POST['submit'])) {
	switch ($_POST['submit']) {
		case "go":
			exec("gpio write " . $leftpin . " 1");
			exec("gpio write " . $rightpin . " 1");
			break;
		case "stop":
			exec("gpio write " . $leftpin . " 0");
			exec("gpio write " . $rightpin . " 0");
			break;
		case "left":
			exec("gpio write " . $leftpin . " 1");
			exec("gpio write " . $rightpin . " 0");
			break;
		case "right":
			exec("gpio write " . $leftpin . " 0");
			exec("gpio write " . $rightpin . " 1");
			break;
	}
}
?>
<!DOCTYPE html>
<html lang="en">
<head>
  <title>PHP/Pi Rover Controls</title>
  <meta charset="utf-8">
  <meta name="viewport" content="width=device-width, initial-scale=1">
  <link rel="stylesheet" href="https://maxcdn.bootstrapcdn.com/bootstrap/3.3.7/css/bootstrap.min.css">
  <script src="https://maxcdn.bootstrapcdn.com/bootstrap/3.3.7/js/bootstrap.min.js"></script>
</head>
<body>
<div class="container">

  <h2>PI Four Button Example</h2>
  <form action="" method="post">
    <div class="form-group">

    <button type="submit" name="submit" class="btn-success btn-lg" style="width:100%" value="go">Forward</button>
    <button type="submit" name="submit" class="btn-info btn-lg" style="width:49%" value="left">Left</button>
    <button type="submit" name="submit" class="btn-info btn-lg" style="width:49%" value="right">Right</button>
    <button type="submit" name="submit" class="btn-danger btn-lg" style="width:100%" value="stop">Stop</button>
  </form>
</div>

</body>
</html>
Mobile CCS Templates
There are quite a few good mobile templates to choose from. Bootstrap (http://getbootstrap.com/) is one of the most popular frameworks, and for Pi applications it seems to be a good fit.
Some of the key items are:
- Add references in to the bootstrap ccs and js files
- Add tags with the required class definitions:
- the btn-lg class will make a large button, instead of standard sized btn
- different button colours are possible using btn-info, btn-success. btn-danger
- Button width is defined with style=”width: xx%” . For multiple buttons the sum of the width needs to <100%

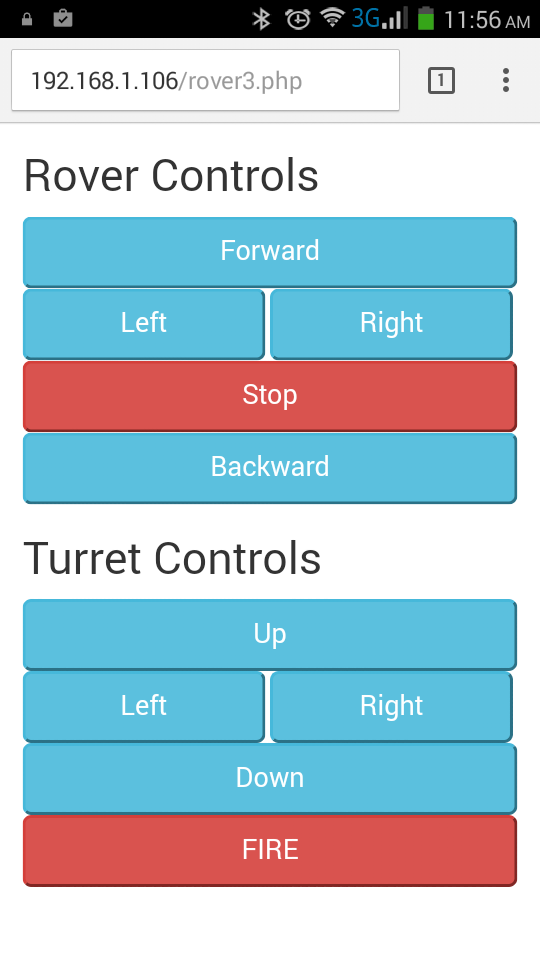
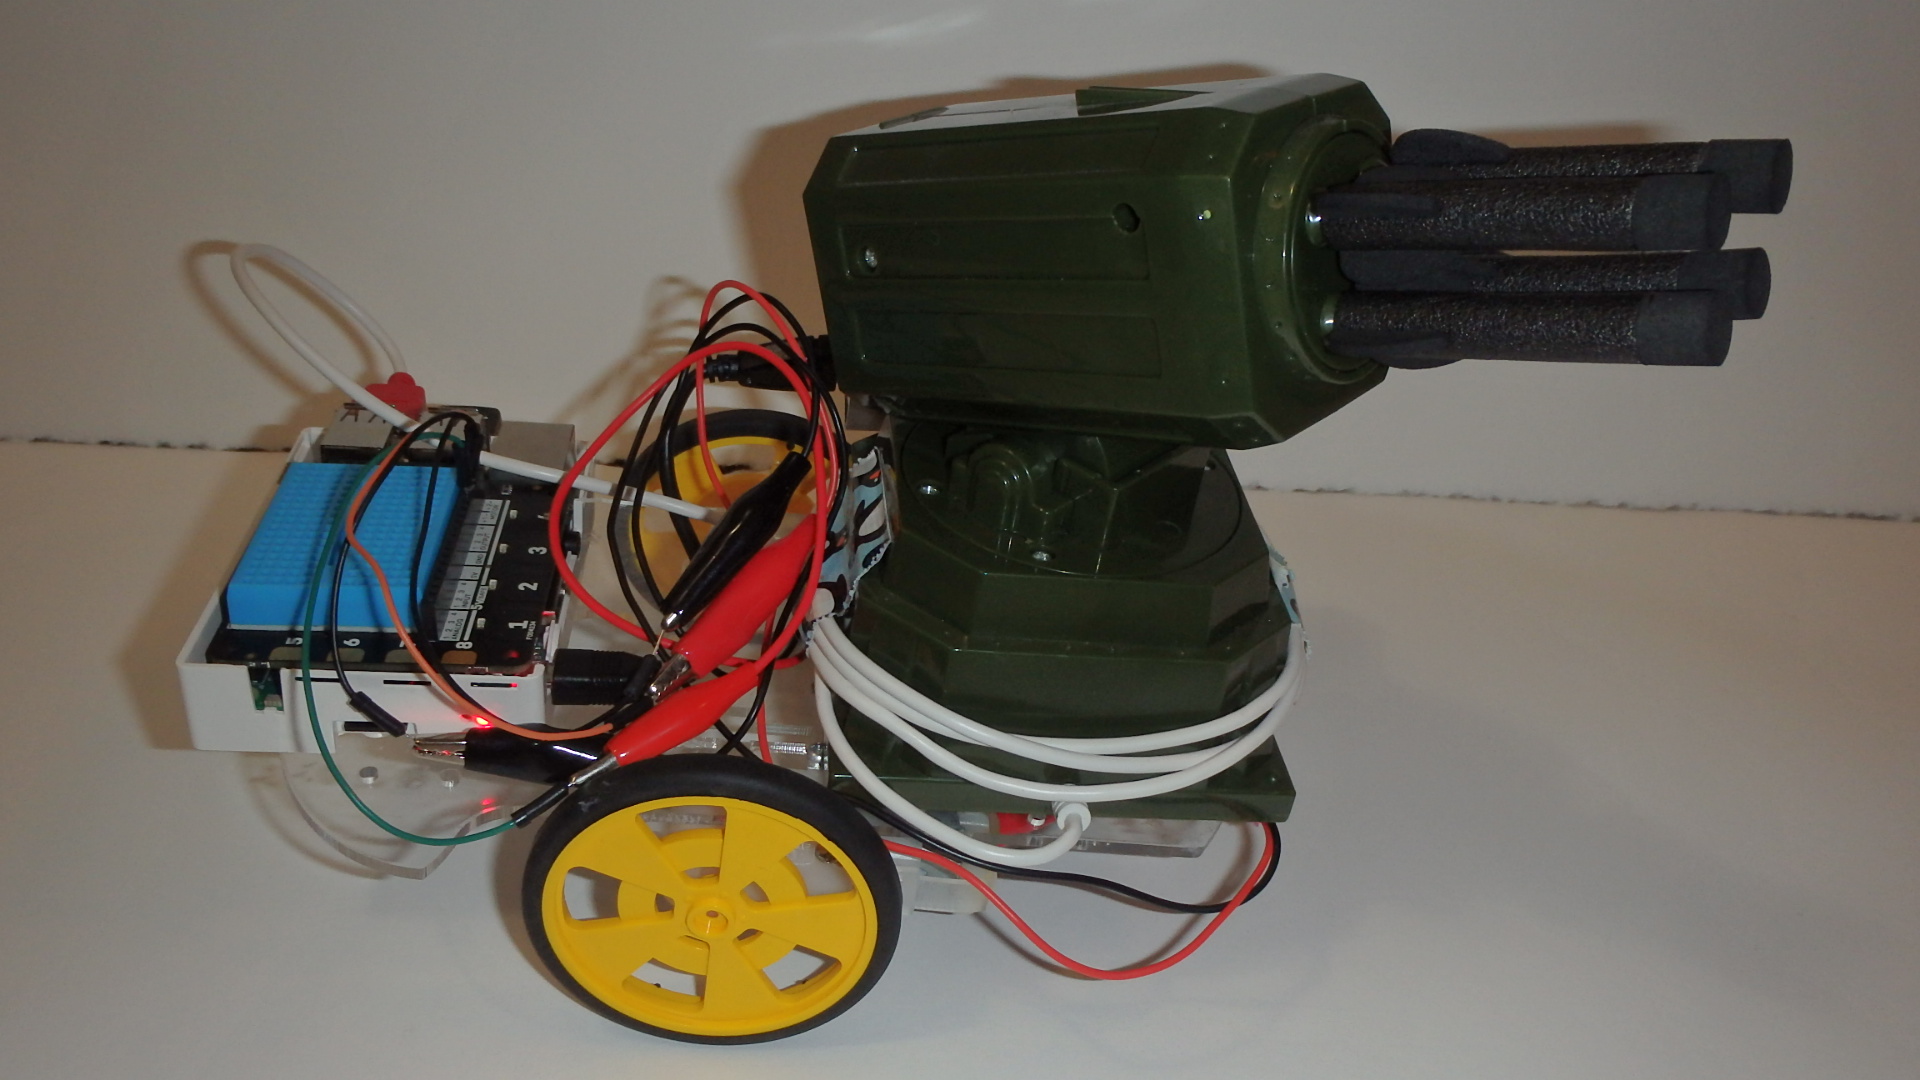
Further Examples
Below are some pictures of a mobile rocket launcher project. The Web page had two sections. The top section controlled bi-directional motors that were connected to a Explorer HAT Pro shield. The bottom section controlled the rocket launcher turret. The missile launcher was connected via a USB cable to the Pi.

Hi, I would recommend using the command line tool gpio first. Gpio should be able to directly read and write to your I/O. This is well documented.
Once you’ve got gpio working then you should be able to use PHP to shell out to gpio.
LikeLike
the command “gpio write 7 1” doesn’t work
LikeLike
You need to look at how your GPIO outputs are defined, this is done by: gpio readall
To define an GPIO pin for writing: gpio mode pin modetype… gpio mode 7 out
Be warning if you are writing Python GPIO programs at the same time as using the command line gpio utility, the Python code will override things. I’ve been stuck with this and I found that using: gpio unexportall , will reset things.
LikeLike