
For home automation projects a Raspberry Pi offers a simple low cost approach for controlling a wide variety of devices. Typically these devices are either digitally wiring 0-5Volt devices like motion detectors, or wireless Ethernet devices like smart plugs, but a Raspberry Pi can also control USB powered devices, like USB fan and lights.
In this blog I will look at how to control and monitor Raspberry Pi USB port with two projects. The first project will use Node-Red to create a web dashboard to control USB lights. The second project will turn on USB cooling fans based on the PI’s CPU temperature.
Controlling USB Ports
There are a number of techniques to control USB ports, I found that one of easiest approach is to use the uhubctl utility. To load this utility:
sudo apt-get install libusb-1.0-0-dev
git clone https://github.com/mvp/uhubctl
cd uhubctl
make
sudo make install
The uhubctl utility can be used to view and control USB ports and ports smart USB hubs.
The lsusb command can be used to show connected USB devices
pi@raspberrypi:~ $ lsusb
Bus 001 Device 003: ID 0424:ec00 Standard Microsystems Corp. Fast Ethernet Adapter
Bus 001 Device 002: ID 0424:9514 Standard Microsystems Corp. SMC9514 Hub
Bus 001 Device 001: ID 1d6b:0002 Linux Foundation 2.0 root hub
For the Raspberry Pi 3 and 4 the power on all USB ports is ganged together through port 2, so unfortunately it is not possible to power up/down an individual USB port.
The Pi 4 has two internal USB hubs. Hub 1-1 connects to all the USB port on the USB 2.10 standard. Hub 2 controls to all the ports on the USB 3.00 standard and the Ethernet jack.
The commands to turn on/off/toggle the USB ports and keep the Ethernet jack powered are:
sudo uhubctl -l 1-1 -p 2 -a on
sudo uhubctl -l 1-1 -p 2 -a off
sudo uhubctl -l 1-1 -p 2 -a toggle
The command will return the messages showing the current status, the power requested state and then the new status. To just do an action and remove feedback messages add a 1>&- at the end of the line.
Monitoring USB Power
The uhubctl utility can be used to check if the USB ports are powered. For Raspberry Pi’s the status of Port 2 is the power status for all the ports.

Using some Bash statements the power status can be parsed to just show off or power message. In the next example this Bash statement will be used to show the power status on a Node Red dashboard.
$ sudo uhubctl | grep 'Port 2' | awk '{print $4}'
off
Node Red USB Control Dashboard
Node Red is a visual programming tool that is included with the full desktop install of Raspberry Pi. If Node Red has not been installed see: https://nodered.org/docs/getting-started/raspberrypi
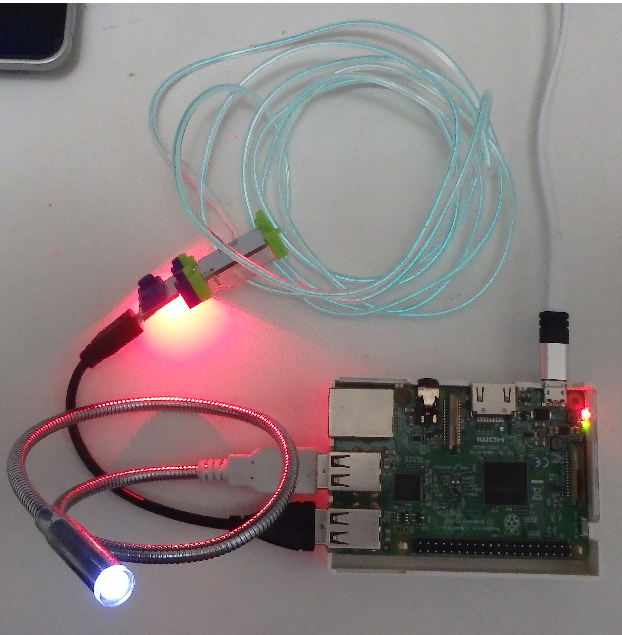
There are number of low cost USB lighting options that can be used with a Raspberry Pi, these include LED strips, eWire and small USB lights. Below is an example of littleBits eWire bit and a USB LED light.
A simple Node Red dashboard can be created that can: 1) turn Raspberry Pi USB ports on and off, and 2) checks the status of power on these ports. The logic would include: 2 dashboard buttons, one dashboard text and 2 exec nodes. The uhubctl utility can be used directly in the exec node.

The first exec node contains the Bash command to turn the USB ports on or off. The “on” or “off” string is sent from the dashboard buttons as a msg.payload this is appended to the command in the exec node. The output from the first exec node triggers the second exec node to get the latest USB port status.

The dashboard text node is configured to show the power status text as a large uppercase heading.

Once the logic is complete, the Deploy button on the right side of the menu bar will make the dashboard available to web clients at: https://raspberry_pi_address:1880/ui .
For my example I added an enhancement to include a countdown or sleep timer.

Raspberry Pi Cooling Fan
Raspberry Pi’s have a number of different cooling options. For this example I used a two littleBits fans that I placed on a littleBits mounting plate.

The vcgencmd measure_temp command will return the Pi CPU temperature. By adding some awk script it’s possible to parse out just the float value:
$ vcgencmd measure_temp
temp=46.2'C
$ vcgencmd measure_temp | awk '{ print substr($1,6,4)}'
45.6
The bc (arbitrary precision calculator) command can be used with the math library (-l option) to check if one float is greater than another float number:
$ echo "33.4 > 36.1" | bc -l
0
$ echo "38.4 > 36.1" | bc -l
1
A simple script to loop through and check the temperature against a limit, and then turn on/off a fan would be:
#!/bin/bash
#
# Check the Pi temperature and turn on fan if too high
#
tlim="46.0"
while :;
do
  tnow=$(vcgencmd measure_temp | awk '{ print substr($1,6,4)}')
  # check the CPU temp vs. the limit
  if (( $(echo "$tnow > $tlim" | bc -l ) )) ; then
     # CPU temp is above limit, turn on fan
     sudo uhubctl -l 1-1 -p 2 -a on 1>&-
  else
     # CPU temp is below limit, turn off fan
     sudo uhubctl -l 1-1 -p 2 -a off 1>&-
  fi
  sleep 10
done
This code can be enhanced to show when the fan needs to be turned on and off:
#!/bin/bash
#
# Check the Pi temperature and turn on fan if too high
#

# Start with Fan on
tlim="46.0"
fan="on"
sudo uhubctl -l 1-1 -p 2 -a $fan 1>&-

# Periodically check CPU temperature
while :;
do
  tnow=$(vcgencmd measure_temp | awk '{ print substr($1,6,4)}')

  if (( $(echo "$tnow > $tlim" | bc -l ) )) ; then
      if [ $fan = "off" ] ; then
    	fan="on"
	    echo "$(date +'%T')  Temp: $tnow - Turn fan $fan"
        sudo uhubctl -l 1-1 -p 2 -a $fan 1>&-
      fi
  else
      if [ $fan = "on" ] ; then
    	fan="off"
	    echo "$(date +'%T')  Temp: $tnow - Turn fan $fan"
        sudo uhubctl -l 1-1 -p 2 -a $fan 1>&-
      fi
  fi
  sleep 10
done
Power Control on other Controllers
A Raspberry Pi can control the power on other controllers, below is an example of a Pi 4 powering an Arduino UNO, an Arduino Nano (clone) and a BBC Micro:bit controller.

For external modules that don’t support Wifi or real time clocks a Raspberry Pi could be used as an easy way to power up/power down these external controllers.
It’s important to realize that a Raspberry Pi is not designed to power devices that have a high power requirement.
The Raspberry Pi 3 and 4 can have a maximum USB port output of 1200mA for all 4 ports combined, with no per-port limits (meaning, all 1200mA is available on a single port if no others are in use). This 1200mA limit assumes that the power is from a 2.5A power supply for the Pi3 or the 3A power supply for the Pi4.
If you connecting smart USB devices like devices like memory sticks or 3rd party controller, the device manufacture has a defined MaxPower rating that can be found once the device is connected.
The command lsusb -v will give a very long list of the full vendor information for all the connected devices. To get just the MaxPower for each device on the Raspberry Pi USB internal bus enter:
sudo lsusb -v 2>&- | grep -E 'Bus 00|MaxPower'
When this command is run with an Arduino Nano, Arduino UNO and a BBC Micro:bit and a memory stick, the total power requirements can be seen.
pi@pi4:~ $ sudo lsusb -v  2>&- | grep -E  'Bus 00|MaxPower'
Bus 002 Device 001: ID 1d6b:0003 Linux Foundation 3.0 root hub
    MaxPower                0mA
Bus 001 Device 004: ID 1a86:7523 QinHeng Electronics HL-340 USB-Serial adapter
    MaxPower               96mA
Bus 001 Device 003: ID 2341:0043 Arduino SA Uno R3 (CDC ACM)
    MaxPower              100mA
Bus 001 Device 002: ID 2109:3431 VIA Labs, Inc. Hub
    MaxPower              100mA
Bus 001 Device 001: ID 1d6b:0002 Linux Foundation 2.0 root hub
    MaxPower                0mA
With this example the total used USB power is 296mA (0 +96+100+100+0), and this is within the Raspberry Pi specs.
A Bash command to calculate the total required bus power would be:
pi@pi4:~ $ (sudo lsusb -v 2>&- | grep MaxPower | grep -o -E '[0-9]+' ) | awk '{ sum += $1} END {print "\nTotal= " sum " mA"}'

Total= 296 mA
Unfortunately devices like USB lights use the USB connection for power only so they do not appear in lsusb, so you’ll need to check the manufacturers literature for power requirements.
Final Comments
I prefer using direct wired GPIO pin connections or Wifi devices over using USB powered devices, however it’s nice to know that you have the USB option if you need it.
For kids projects that use littleBits or Micro:bits using a Pi with Node Red offers a nice way to remotely control them.
